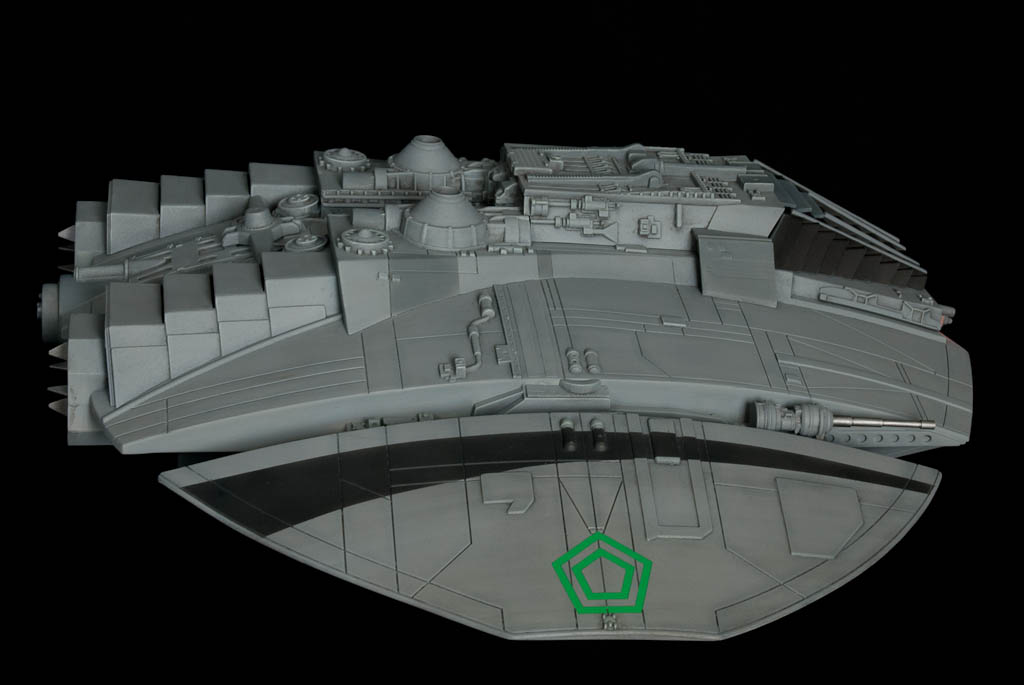
A flurry of activity to get this finished in time for a show last week. After putting it off so long I finally had to fix all the electronics in place and glue the fuselage together – the point of no return – so that I could then tackle the seams this would create – and these were probably the worst in the whole model. Underside front and back there is a recessed lip, which was relatively flush, but still took quite a bit of putty to fill. Then there were the seams down the sides where the wing tips connect… This took considerable putty-sand-repeat until the finish was satisfactory, hampered to some extent by the wing tips having to be partially connected due to the fibre feeding the guns. In hindsight it would have been much easier to leave all of the wingtip and gun assembly until after the fuselage, but there we go. All the puttied areas were touched up with the base grey and then weathered down to match the surrounding areas.
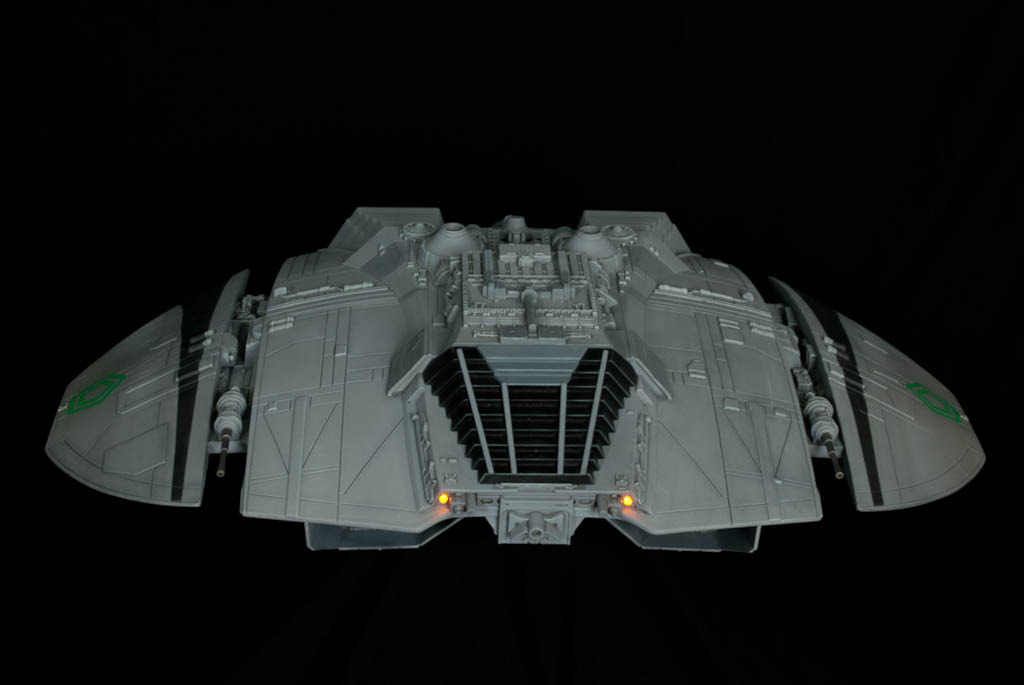
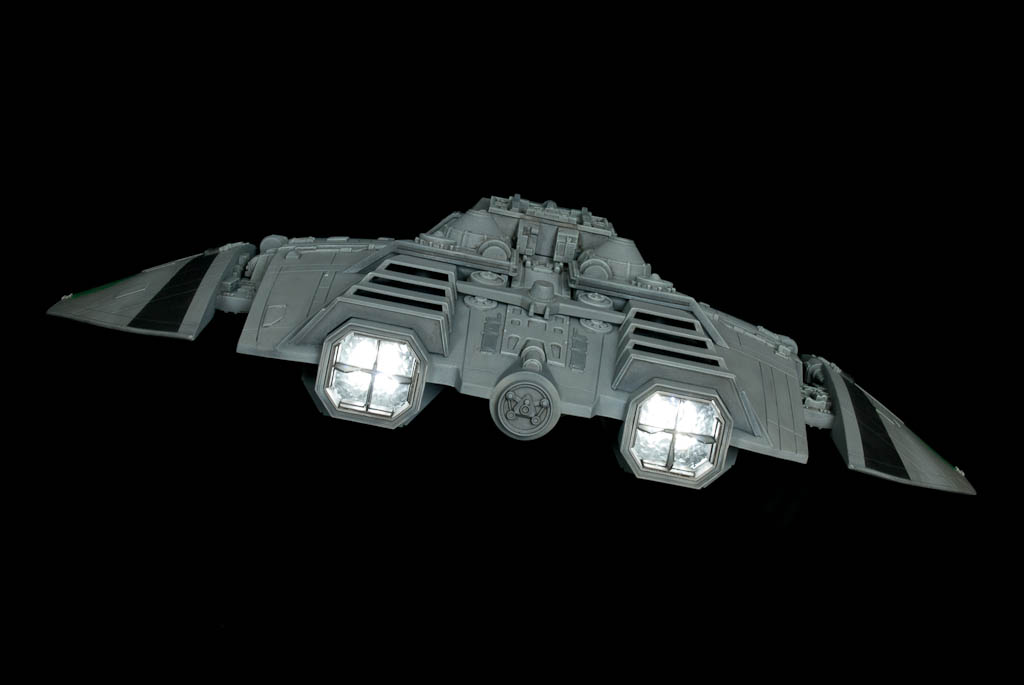
It was then time for the final lighting test. Any problems now and I would be stuffed. Headlights – check. Underside lights – check. Engine ramp up – check. Guns – only one firing! Oh no! I’m stuffed! Disaster! Anguish! Panic! Depression… This was the worst case scenario. I had to go back past that point of no return again! It would be impossible to seperate the two halves without destroying the model, but there was one glimmer of hope. There is a 3″ x 2″ panel on the bottom where the stand is supposed to attach – if I could remove that, I could cut a hole underneath and hope to see what had happened. However because the stand attached to the panel, I had glued the panel down really really well. After much gentle prising and getting nowhere I was getting more depressed and desperate and started to pull harder and harder. Finally with a loud “pop” one end came loose, which allowed the insertion of a steel ruler to help lever up the panel until finally the joint at the other end gave way just before the plastic itself did!
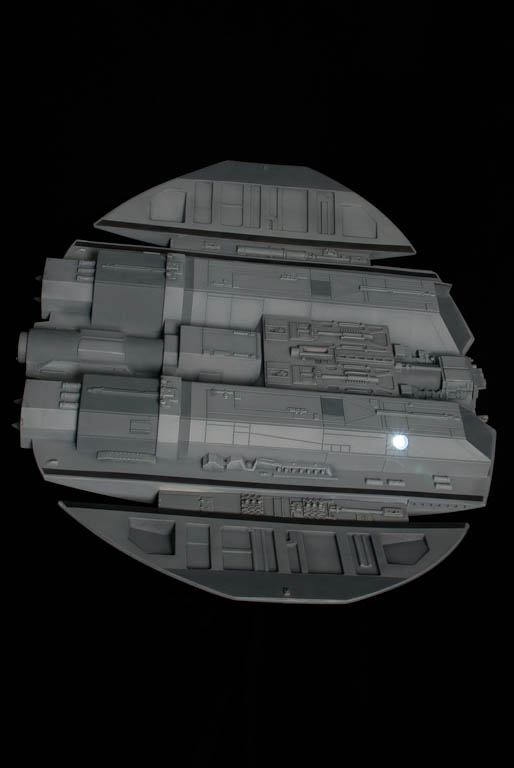
The next task was to cut open the belly without risking even more damage to the wiring inside. Using a panel line scriber I slowly scribed out a section, round and round until the plastic was just cut through and the whole piece could be lifted out.
From there it was easy to see the problem: one of the fibres had come loose from the tape binding it to the LED – almost certainly as a result of all the jiggling about of the wing tips as I was fixing the side seams. This time I glued the fibres into one end of a tube with some clear epoxy, and glued the LED into the other, before binding it all up in tape again. Nothing is coming out now!

I made an inner lip around the hole with some strip strene for the piece I had cut out to sit back against, and then glued the panel back over the top – lightly this time just in case I ever need to get back in again. Having already tried the model on the stand, there was no way it was ever going to stay on that, it’s just way too wobbly. Instead I think I shall make a cradle from clear acrylic at some point..
So here we are – finished!