After the success of adding a working display screen to Gerty last year I’d been thinking about doing the same to something else. Re-watching Interstellar a while ago made me realise TARS the robot would be a great choice for a scratchbuild project. TARS himself is a relatively simple design, and there were some blueprints on the Blu-ray extras that showed the overall measurements of the full sized prop. From this it was easy to extrapolate all the others.
The first task was to draw up the parts in Sketchup full size and then resize down to get some figures to work with. A 1/6th scale model seemed to be a good place to start.
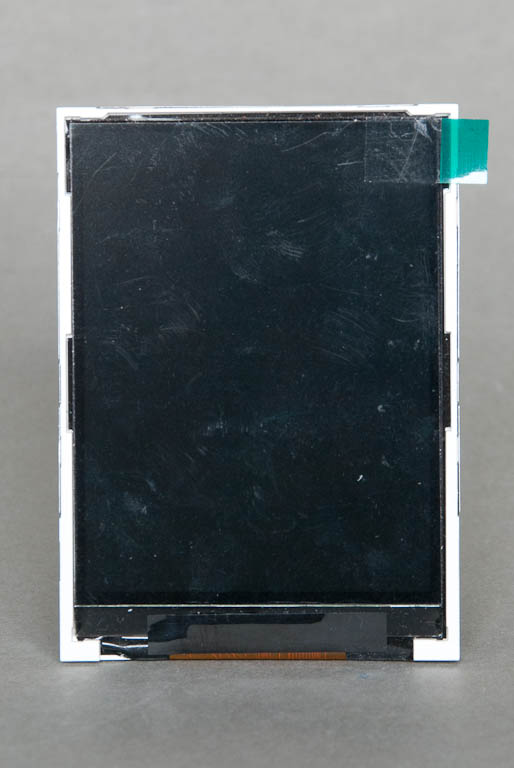
TARS has 2 portrait orientated screens behind a tinted facia. Initially I figured I could use a single small LCD in landscape mode and use a portion of the LCD for each screen. The modules have a small plastic surround that holds the glass LCD in place. It’s only a couple of mm on 3 sides but unfortunately one end is much thicker to accommodate the flexible connector to the controller electronics. This means a) with the module in landscape orientation, the active LCD area is offset from one side and b) the wide border is too wide compared to the border of the TARS screen on one side. So I have to use the display in portrait mode, which in turn means most of it will not be used.
Looking around at available LCDs, a module with a 2.8″ active area seemed to be in the right ballpark – this would just be wide enough in portrait orientation for both TARS’ screen at exactly 1/7th scale. Slightly smaller than originally planned but this will alleviate some other issues to do with making the body too.
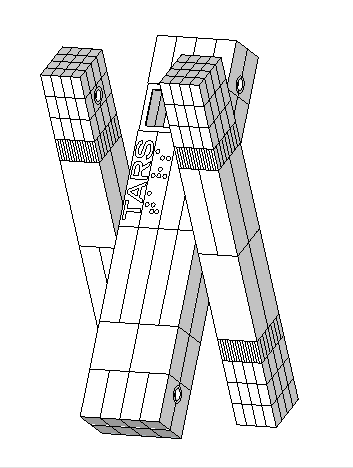
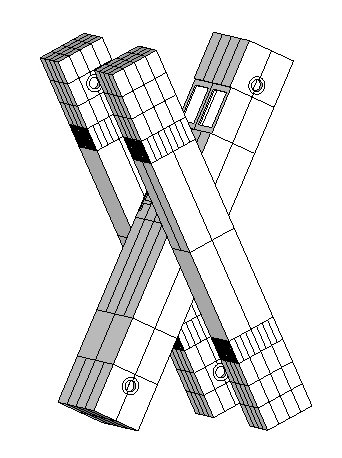
I intend to mill out and engrave the body from solid blocks of probably just resin (or maybe PU foam) but my small CNC mill has a very limited work area. The next job was breaking TARS down into manageable pieces. The arms were easy; these can be split in 2 in the middle. Despite the inside face of the arms being slightly different (no fine detailing and pivot point locations) I can make 2 complete arms from 4 copies of one half. The body is slightly more complex – it’s basically 4 pieces, 1 for the top front (including name and holes for screens) and 3 identical ‘blanks’ for the others.
The front of the LCD needs to be as close to the inside of the bezel around the screen holes as possible, which means the top part will need to be almost hollow. A battery pack of 3 AA cells will power the module, and this will be inside the bottom half, so each of these will need to be hollowed out as well, but not to such an extent. Access to the battery pack will be necessary occasionally so my plan is to hold everything together with magnets. These will also be used to hold the arms to the body, allowing both rotational movement and changing of pivot point from top, middle or bottom to provide a number of posing opportunities.
A few more hours with Sketchup and I ended up with this:

Next up was the electronics. I drew up a design based around an Atmel ATMEGA328 microcontroller (as used in the Arduino development board). This communicates with the LCD over a simple serial interface. I decided to add in some extra components since this may end up being used in other projects – a micro-SD card reader (handy for showing images on the LCD like in the Gerty project) and an expansion connector to allow some of the other spare I/O ports of the microcontroller to be connected up. The board sits neatly on the back of the LCD module and is only a few mm thick.

Most of the time, all you see on TARS’ screens is a continual stream of text printing out – the left one is usually white and the right one is green. The LCD resolution (128 x 160 pixels) is far too low to show real text, so this was simulated with single pixels. A loop constructs a line of random length made from words of random length and draws each line out, one letter pixel at a time. This happens simultaneously on both screens. Once a screen is full, it is cleared and the process starts from the top again.