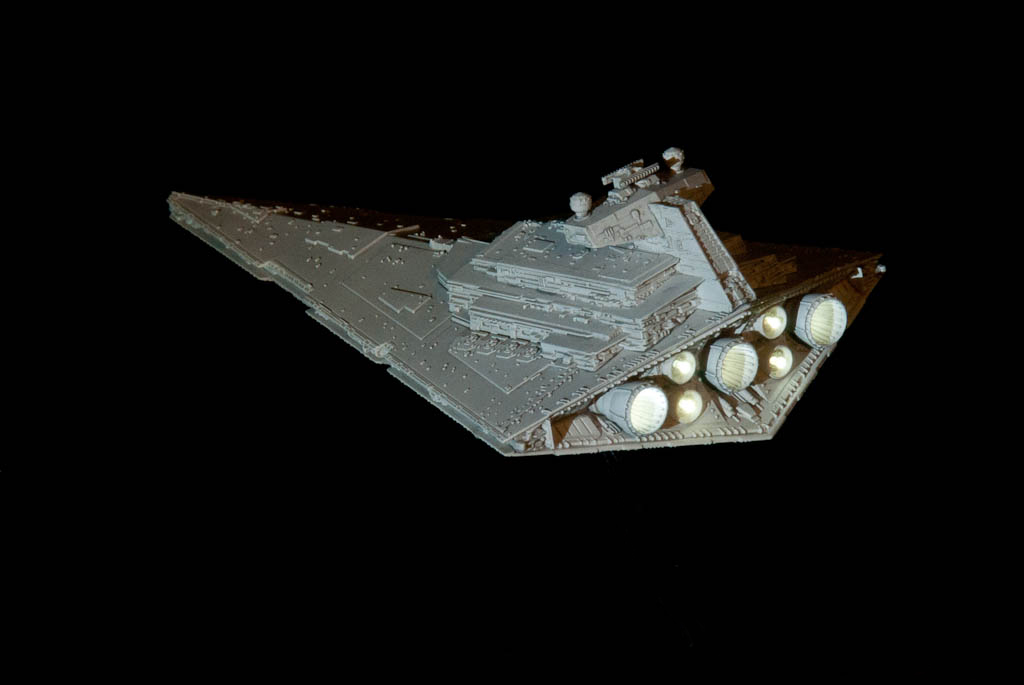
Everything is just about there. The fibre marries up with the central LED much better now. I’ve added some short lengths of 1.5mm fibre at the rear of the 3 main engines to act as light pipes – this gives a much better effect inside the engine bell than just having a hole.

The last thing to resolve is the wires for the battery supply. I want these to run down through the stand, but it’s just a bit too small to get 2 bits of my smallest stranded cable down. For now I’ve used 2 bits of solid core wire wrap wire – these are plenty small enough, but will not survive much manhandling or moving of the ball & socket joint. Need to come up with a better solution…
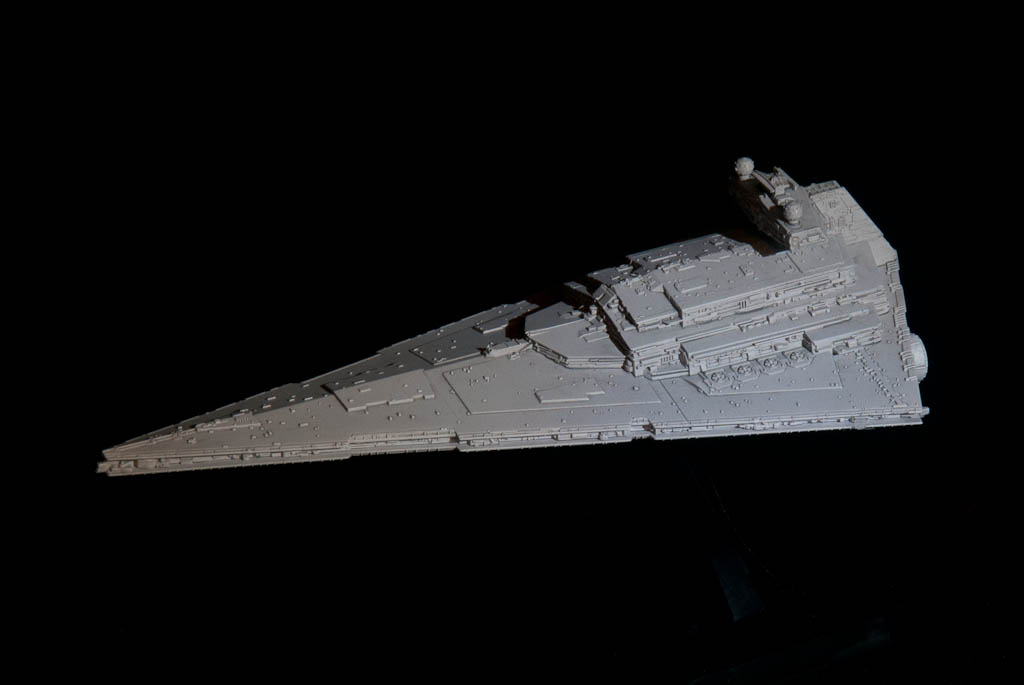
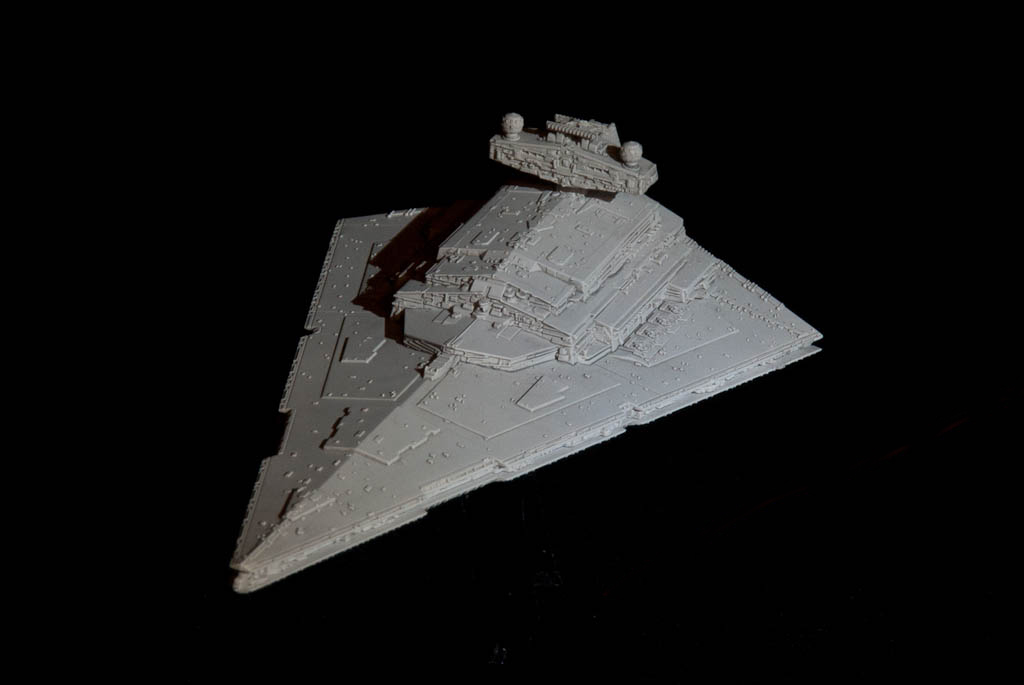
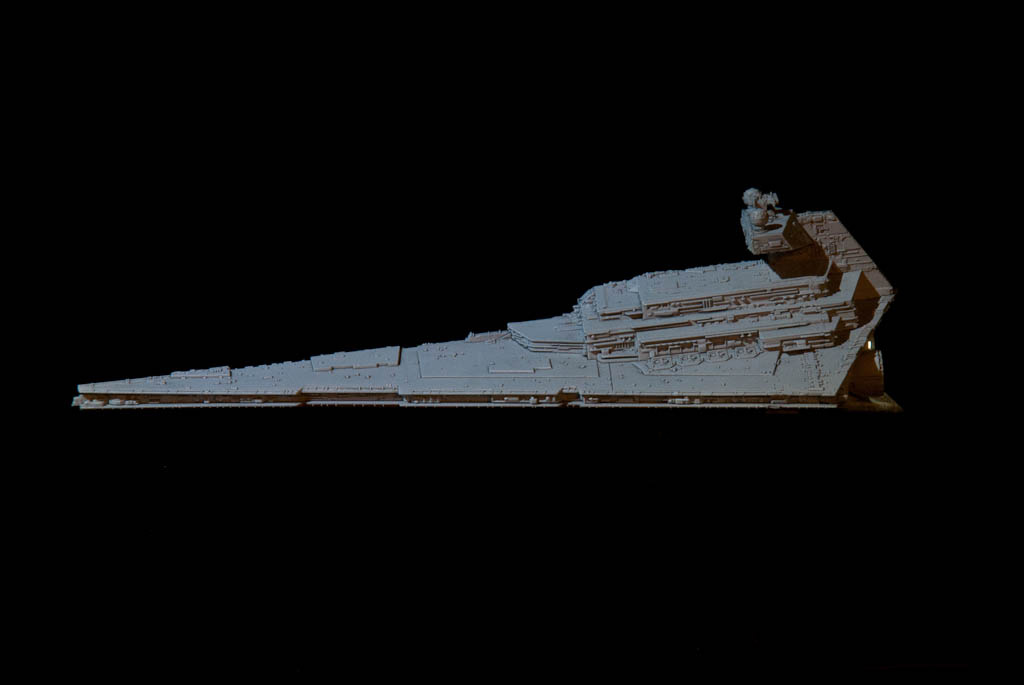
For now here’s some beauty shots. The ship was primed in a just off-white colour and then given a wash of Concrete Flory Wash. Once dry, the excess was wiped away with a slightly damp sponge & that’s it. I’ve used a focusable LED torch several meters away as a slight source in an attempt to simulate the parallel light of a far-distant sun…
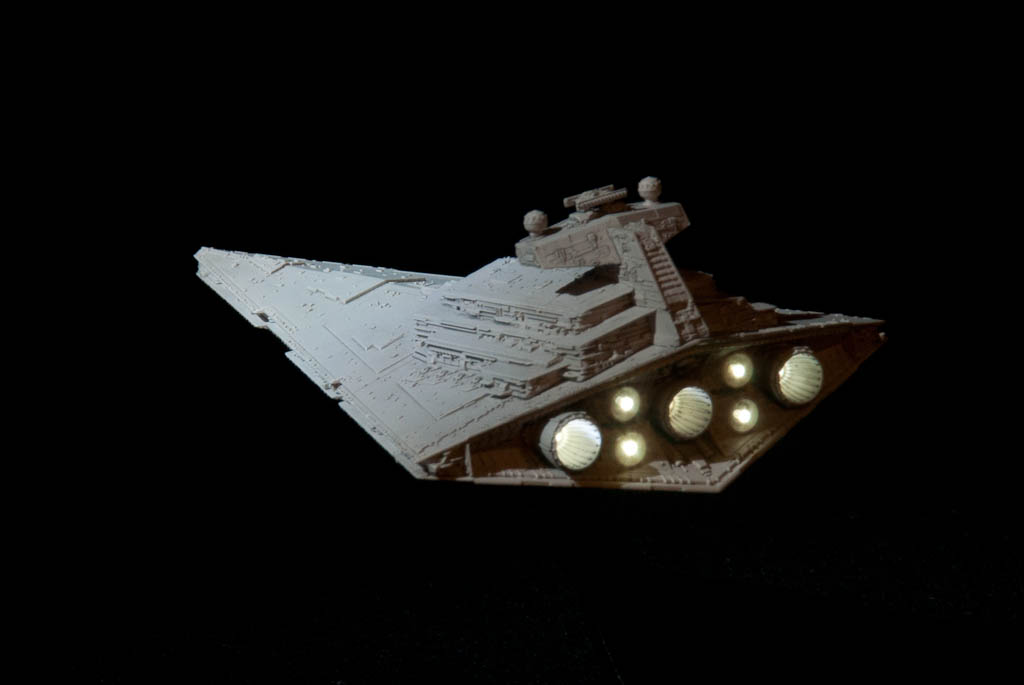

That. is. the. bomb. The only update I would make is to do a clear blue wash over the lights to tint them.