Gerty Part 2 – OLED Test

<< Part 1

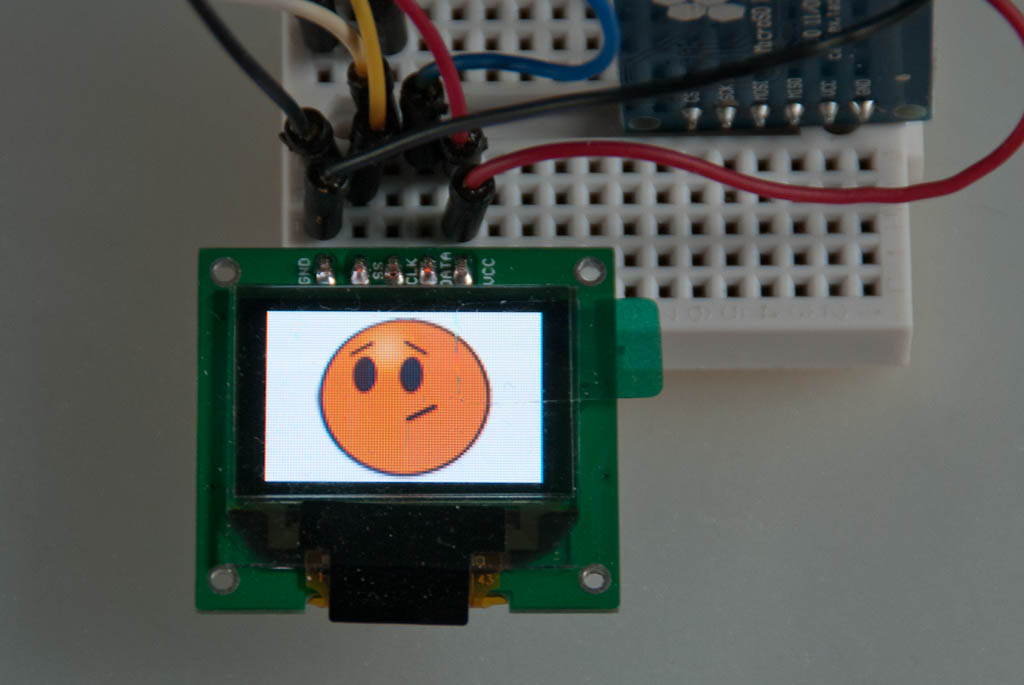
The OLED display uses a serial interface (SPI) to the microcontroller, which basically means all the data is send along one wire, one byte at a time (with a couple more wires to control the flow of the data). This makes connections very simple, but this comes at the expense of speed of communication. The software library that was supplied with the display wraps up the control of the data lines so that it is also easy to send commands such as draw line or show bitmap without having to worry about how the data is actually sent between the MCU and the display.

Displaying a full screen 96×64 bitmap took nearly a second, and the image could be seen appearing down the screen. When Gerty is in his unhappy/concerned mood, the image alternates between two views, one looking left, one looking right. I wanted to be able to reproduce this on my version, but that was going to be impossible at that speed.

The display library code library is generic and flexible, but controls all of the actual data transfer itself. The Atmel MCU supports a “hardware” SPI mode which allows the MCU to take over the data transfer at a very low level and is about 5 times faster that doing it via software. It was relatively straightforward to modify the display library to use the hardware SPI mode which gave an immediate improvement to the speed the screen is drawn.

The MCU does not have much RAM (2k) and a single full screen image is 12,288 bytes in size (6144 pixels with 2 bytes of colour data per pixel). The MCU does have much more flash memory (32k) and the display library expects any bitmaps to be displayed to have been saved into the flash memory when the MCU is initially programmed. I wanted to be able to load an image on demand from the SD card and then display it, so another modification to the library was required. An additional function was added that would display a single pixel high bitmap from data held in RAM. It then became a case of loading each line of the bitmap from the SD, sending it to the display and then moving down to the next line, until all the bitmap had been transferred.

The end result of these modifications was the ability to show any image on the SD card on demand, almost instantaneously.

Part 3 >>

Gerty from “Moon”

One of the best films of 2009 was Duncan Jones’ debut Moon, not least because it featured some high quality physical model-work. I’ve already built the SRS kit of the Lunar Rover, but now a kit of Gerty the computer is also available from Steve Howarth, the model shop supervisor on the film, and builder of the original props!
This is a 1/6th scale exact replica and comes in 24 resin pieces, as well as some LED assemblies for the strip lights, Gerty’s eye and a backlight panel for the main screen. To complement this there is a selection emoticons colour printed on acetate to insert into the screen to bring Gerty to life. There is also some brass wire and foil for extra detailing, some printed Post-It notes as seen in the film and finally a comprehensive set of decals – of which there is 3 copies of each to cover any mistakes in application.
The resin is of good quality generally but there were quite a number of pinholes that needed filling, particularly on some of the edges. Filling is fairly straightforward but did take quite a while in the end to get them all. It’s sometimes easier to drill out a tiny bubble with a 1mm bit just so you’ve got something a bit larger to squish the putty into.
Gerty bits
It would normally be quite a straightforward build – fit of the parts is good and can be painted beforehand in most cases, but I decided to go a little bit further and try and replace the screen with a fully functional OLED one, driven by a microcontroller and able to show the full range of Gerty’s emoticons.
The kit screen is almost exactly the same side as a 0.96″ colour OLED device available from Digole.com – the active area is just marginally smaller, but it’s good enough. The biggest problem is that it comes attached to a larger PCB containing the display controller which means it’s not going to be a drop-in solution and some surgery will be required to get it into place. I think I will need to completely remake the surround & shade from scratch to accommodate it, but this should be a relatively simple job in plasticard.
The display controller communicates over a serial interface which means it’s very simple to connect to a micro controller. It has a resolution of 96×64 pixels with a 65k colour depth – not huge but even at this size, the data for just one emoticon would nearly fill the available flash memory of the microcontroller. I want to have all 11 emoticons available, plus a “boot” screen so additional off-chip storage in the form of a micro-SD adapter is also required. Luckily this uses the same serial interface so again connectivity is kept simple.
Gerty Bemused
There’s plenty of room inside the main body behind the screen for all the electronics, but probably not the batteries too. This probably isn’t too much of a problem as Gerty is designed to be suspended from above, so will need some sort of corridor section to hold her (him?) anyway which will probably give ample battery storage space.

Part 2 >>