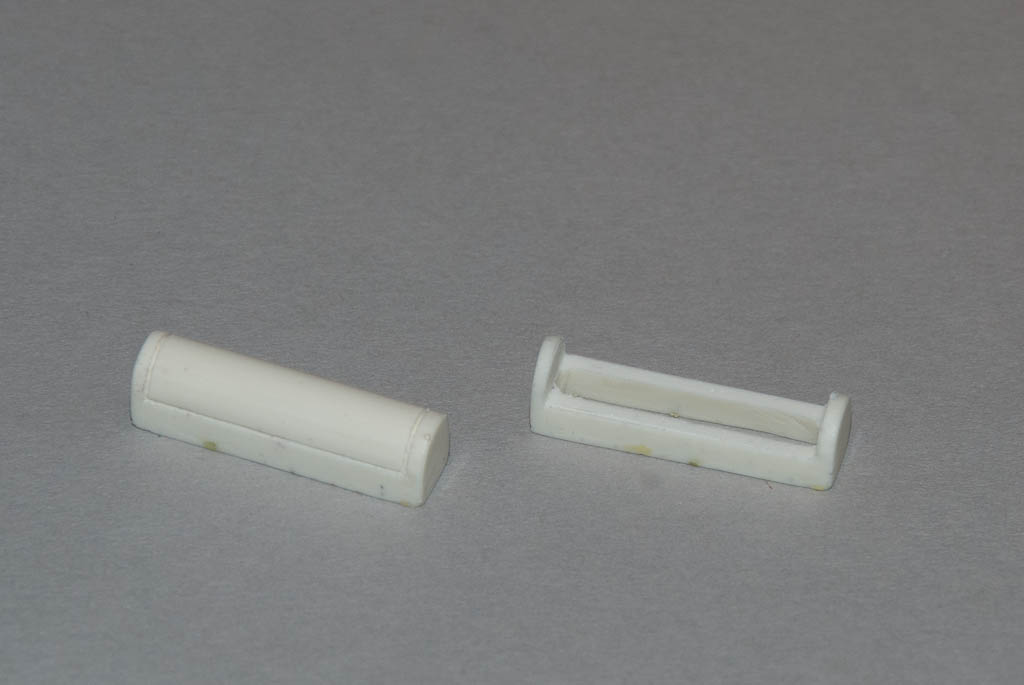
There are 2 fluorescent strip lights which are cast in resin and intended to be lit from behind by a row of 8 LEDs provided in the kit. I decided to try and create a more energy efficient light to prolong battery life. After a fair bit of experimentation and prototyping, I came up with the following solution:
What would be the clear section of the resin part was carefully removed using the milling machine.
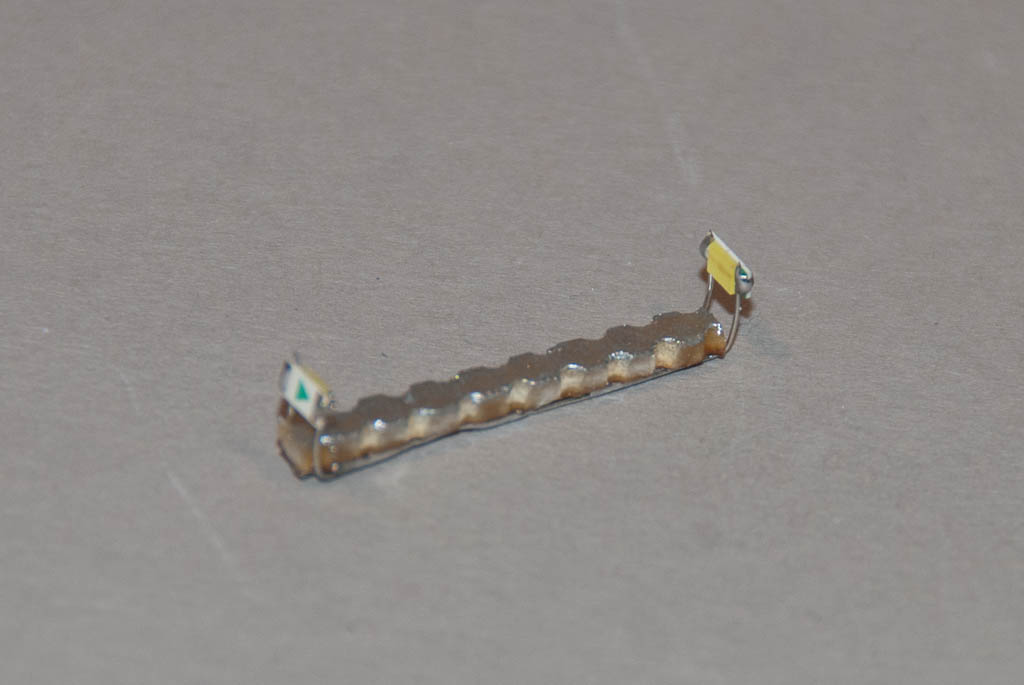
A sliver of stripboard that was trimmed down to fit inside the resin part, whilst still having the remains of 2 copper strips running along its length. One of the copper strips was then cut in the middle of the board to electrically isolate one half of each end.
a thin piece of solid core wire was soldered onto each copper strip so that it protruded past the end of the stripboard.
Now for the really tricky part – a surface mount cool white LED (1206 size) was soldered onto the protruding wires at each end, about 5mm from the end of the board. The LEDs were arranged so that both cathodes were connected to the wires on the strip that runs the length of the board, and the anodes were connected to the wires on the 2 separated strips.
The LEDs were then carefully bent up so they faced inward to each other from the top side of the board.
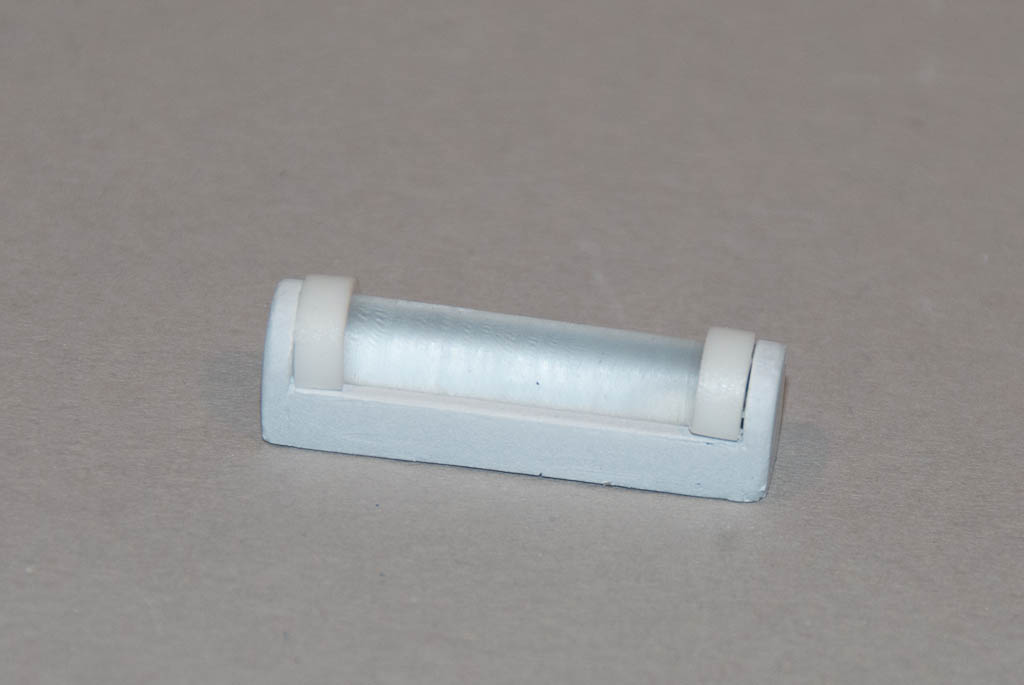
A couple of pieces of clear acrylic rod were turned down on the lathe to about 5mm in diameter, and were gently sanded with 800 grit wet & dry. This will help diffuse the light that comes later.
Each piece of acrylic rod was trimmed in length so that they fitted exactly between the 2 LEDS once the stripboard was mounted inside the resin light unit. The ends of the rod were countersunk a little to help the LED sit as flush as possible with the end.
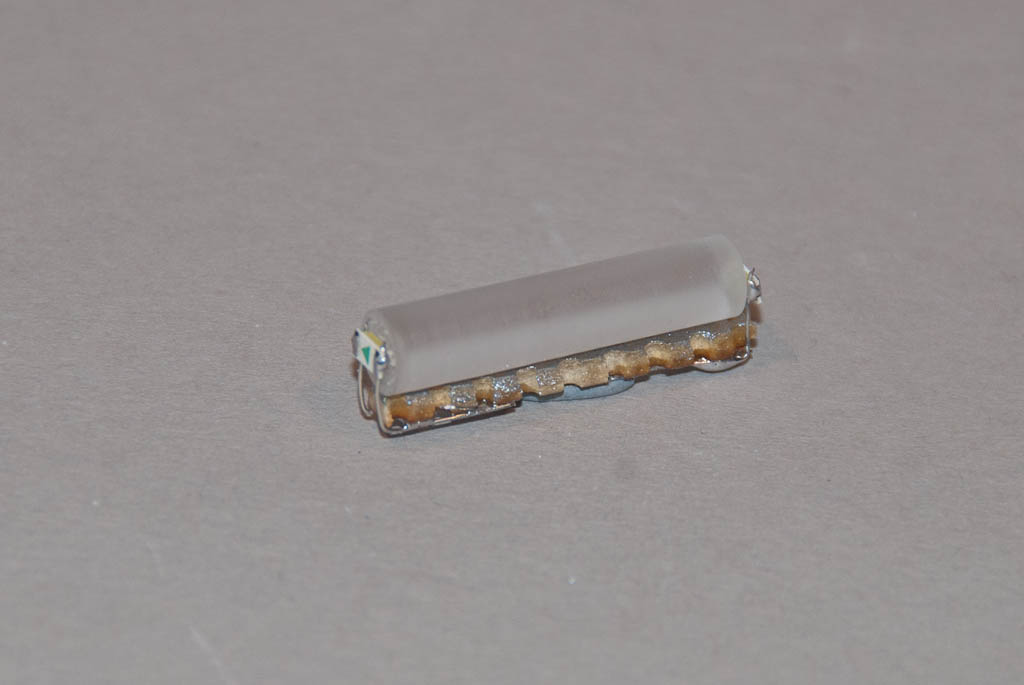
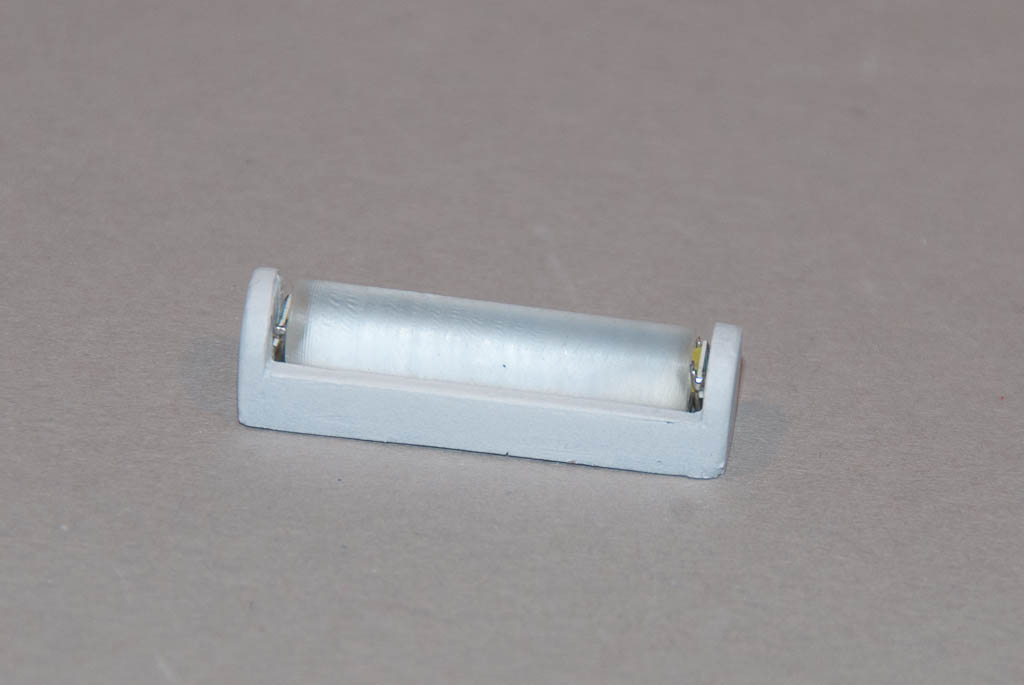
Finally some 2mm wide end covers were cut from some 8mm styrene tube – first a 2mm ring was cut from the tube, then a near 180 degree segment was cut so that it sat neatly over the acrylic rod, whilst coveing up the LED and connecting wires. This took several attempts to get an exact fit.
3 wires are soldered to the bottom of the stripboard, one common connected to both cathodes, and one for each anode. These will be connected to the controller unit in due course.
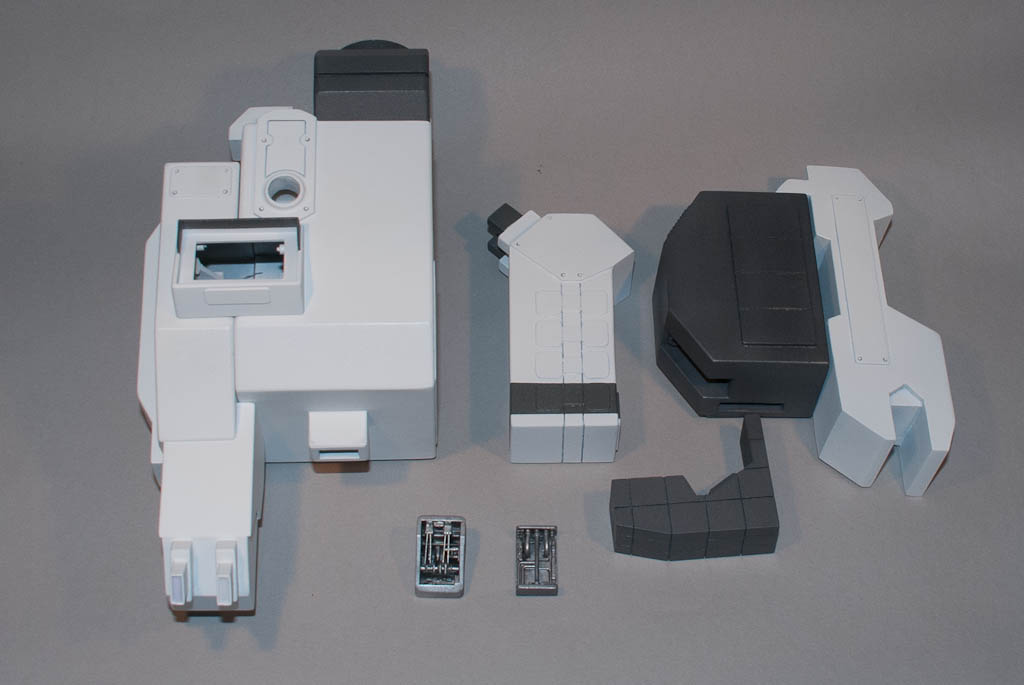
Meanwhile all the major components were sprayed white, or dark gunmetal as appropriate. They were then given several coats of Johnson’s Wax (aka Future Floor Polish) to provide a glossy surface on which the many decals will be applied.
The 3 small “mechanical” looking inserts were base-coated in gunmetal and then had the detail accented with some light silver drybrushing. Some thin brass rod is supplied to provide extra detailing.
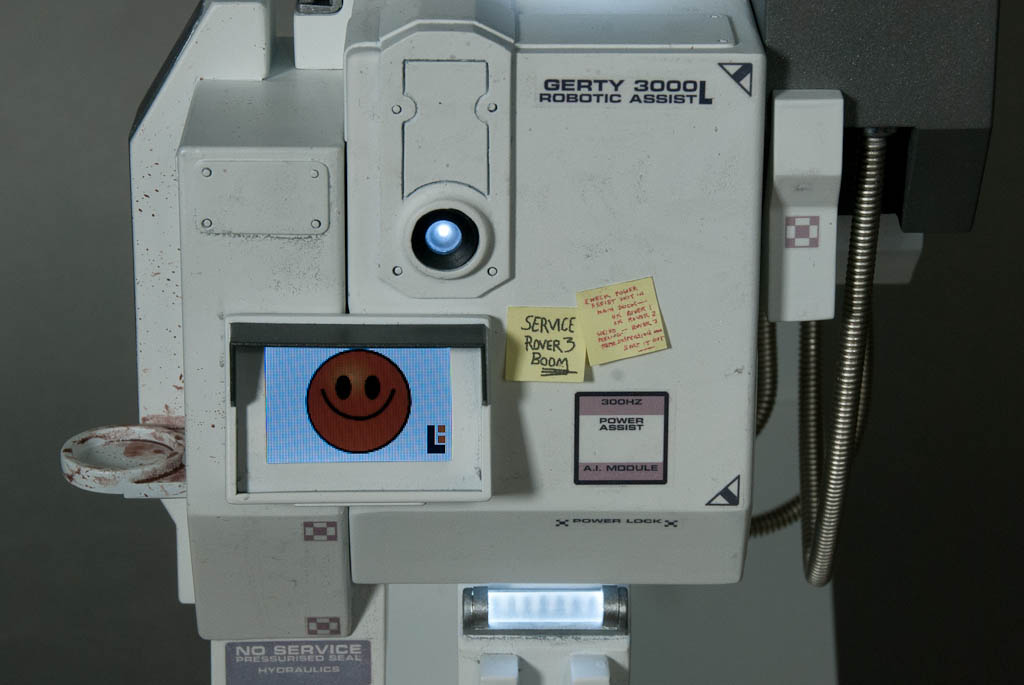
Decal application was relatively painless but time consuming due to the number required. I tackled this in several sessions to allow one set to adhere completely before applying more in the same area. Beforehand I tested a couple of scraps of the decal material with both Micro Set and Micro Sol setting solutions. Micro Sol was a bit too agressive and caused considerable wrinkling of the film, but Micro Set seemed to be ok. None of the decals need to go on curved surfaces or over uneven details, so you could probably get away without a setting solution at all. Although Steve provides 3 sets of decals to cover mistakes, I found them plenty strong enough and didn’t need any spares at all.
After they were all throughly dry, an overcoat of Testors Acryl Master clear matt was liberally applied to remove any remnants of the glossy Johnson’s coat.
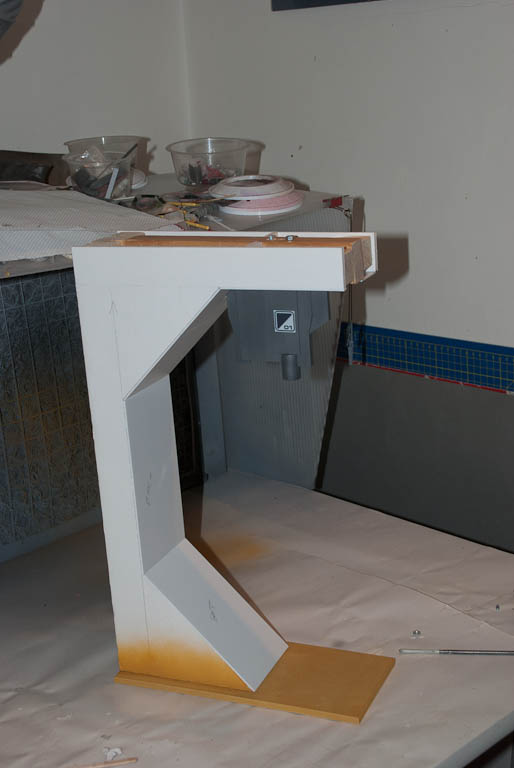
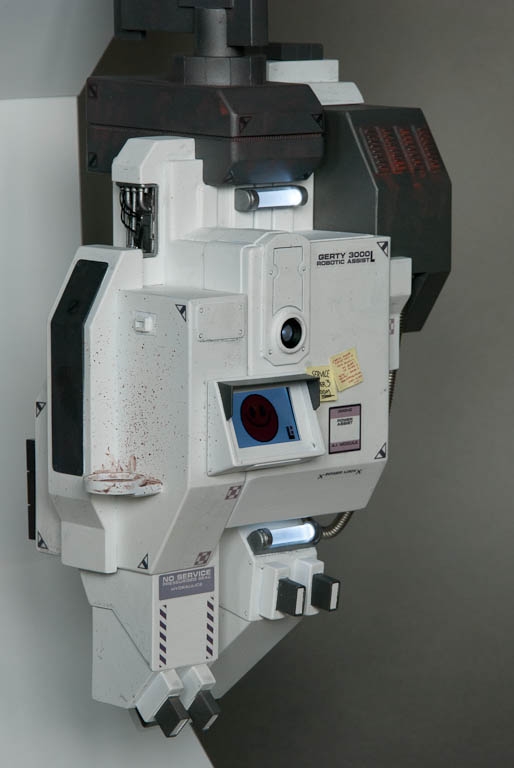
One of the issues with this kit was always going to be how to display it. Gerty ferrys himself around the moonbase suspended from tracks in the celing. To have a ceiling, you also need a wall and a floor. Steve had an impressive section of corridor used to display his master at the UKGK Show last year, but it was huge! I’d never have space for something like that so decided to come up with a “bare minimum” version. The critical dimension was the space between shelves in my display cabinet, which is 17″. I made a basic gallows from 1″ wooden batten and a bit of MDF I had kicking around. This gives a scale room height of 8 feet which seems reasonable.
3 holes were drilled into the end of the batten in line with the 3 holes in the large flat plate in the kit – 2 of these are for threaded studding to hold the kit in place, and one is for the power leads to exit. The kit is supplied with studding but they were too short for my needs, so I found some longer M3 bolts and cut the heads off.
The gallows was then blocked out into a basic corridoor wall section using foam core and sheet styrene. Nothing fancy, just a basic “C” shape with a slot in the ceiling where Gerty would trundle along.

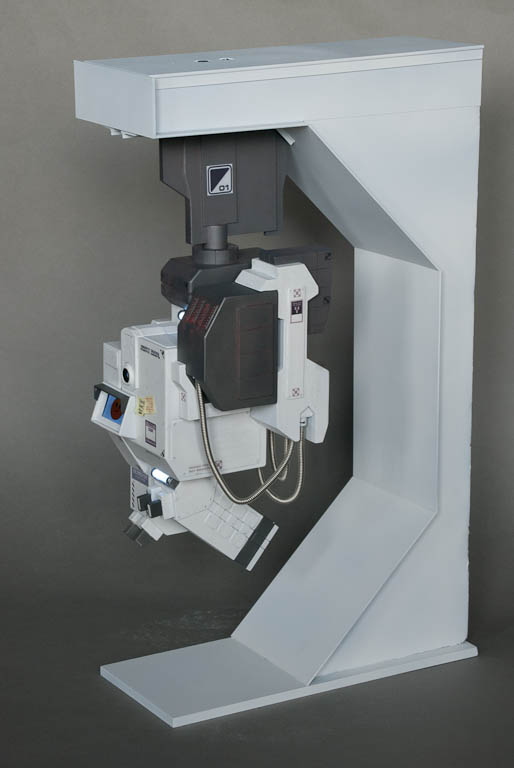
The power wires connect through the support gantry to a battery box hitten in the top section of the base. 3 AA cells provide enough power for around 24h of continuous operation – certainly enough to cover a weekend show period.
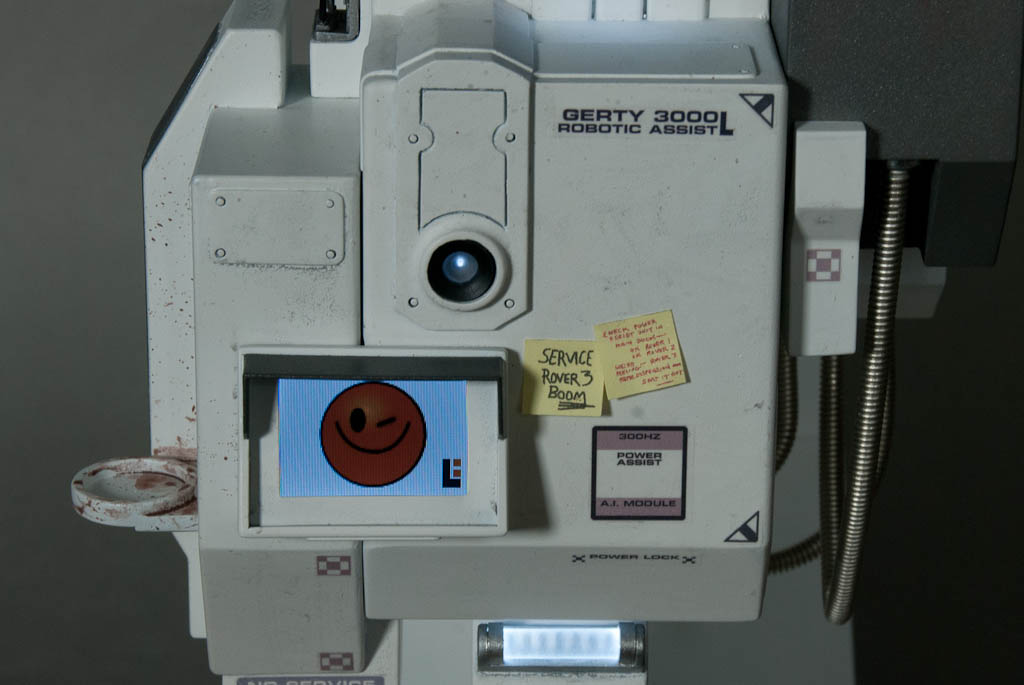
After final assembly, some weathering was applied using Flory water soluble washes. A liberal coat of dark grey was applied and then wiped around to give the required overall dirty appearance. Then some rusty stains were added around the vent slots in the large grey unit on the right hand side, and around some of the other grey items. Finally a liberal amount of “coffee” was slopped and splashed around the cup holder on the left.


A video of Gerty in action
Gerty is available direct from Steve Howarth through Etsy